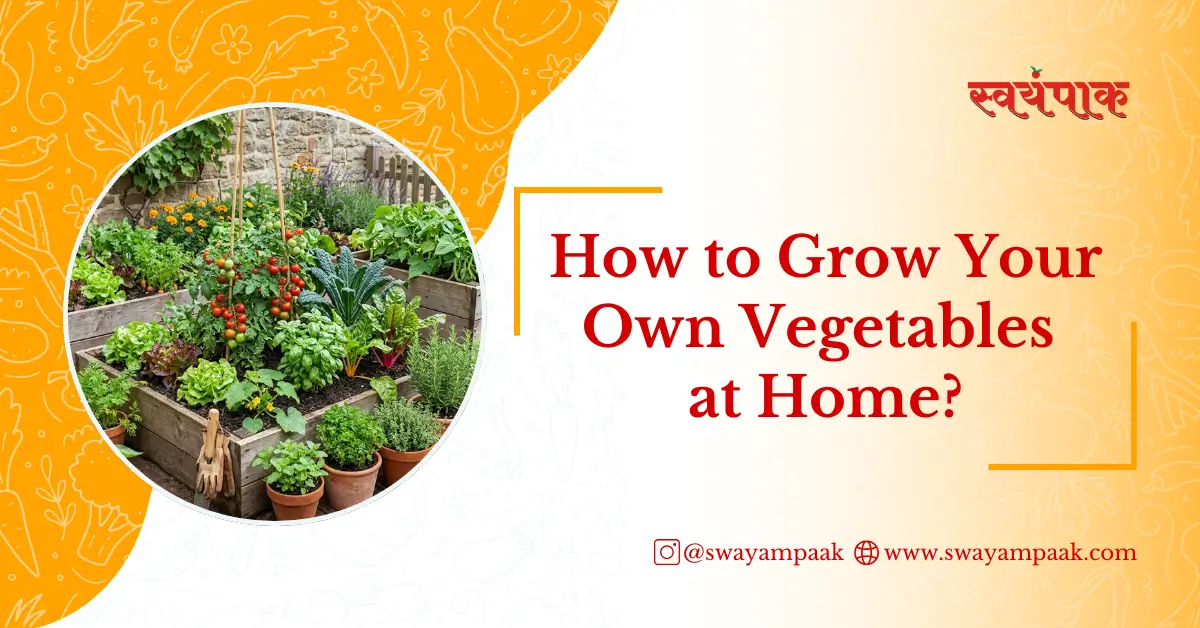
Can you grow vegetables at home without a garden? Yes. In 2026, urban gardening focuses on maximising small spaces such as balconies, terraces, and windowsills that receive 4 to 6 hours of direct sunlight per day.
By utilising high-drainage container systems and nutrient-dense organic soil, home growers can produce a year-round supply of staples, including tomatoes, potatoes, and medicinal roots like turmeric and ginger. This approach reduces grocery costs by an average of 15–20% while ensuring 100% pesticide-free produce.
- Why Home Gardening Matters in 2026?
- Why Learning How to Grow Your Own Vegetables at Home Is Worth It?
- What Vegetables Can I Grow at Home in India?
- Step 1: Choose Your Space: Balcony, Terrace, or Garden
- Step 2: The Right Soil Mix for Pots and Containers
- Step 3: Choosing Pots, Containers and Grow Bags
- Step 4: How to Plant Seeds, Transplants and Kitchen Scraps
- Step 5: Root Vegetables and Pantry Staples: Potatoes and Tomatoes
- Step 6: The Aromatic Herb Garden: Mint, Coriander, Rosemary and Oregano
- Step 7: Medicinal Rhizomes and Bulbs: Turmeric, Garlic and Ginger
- Indian Seasonal Planting Calendar: What to Grow and When
- How to Water Your Home Vegetable Garden (Without Overwatering)
- Natural Pest Control: Neem Oil, Companion Planting and Home Remedies
- Your Personalised 2026 Planting Calendar
- Why Are My Plants Dying? Troubleshooting 7 Common Problems
- Can I Grow Vegetables from Kitchen Scraps?
- Frequently Asked Questions About Growing Vegetables at Home
- Your First Harvest: A 30-Day Quick-Start Checklist
Why Home Gardening Matters in 2026?
Beyond the hobby, home cultivation has become a pillar of personal wellness and sustainability. This guide breaks down the transition from consumer to producer through:
- The Kitchen-to-Container Cycle: Learn to plant from seeds or upcycle kitchen scraps (like garlic cloves and ginger rhizomes).
- Organic Pest Management: Using bio-mimicry and neem-based solutions to keep your “farm” safe for children and pets.
- Precision Harvesting: Identifying the peak nutrient window for every vegetable type.
Why Learning How to Grow Your Own Vegetables at Home Is Worth It?
If you want to know how to grow your own vegetables at home, the good news is that you do not need a garden to do it. Homegrown vegetables, by contrast, go from plant to kitchen in minutes, which means better flavour, higher nutritional value and considerably less waste.
Beyond the economics, there is a quiet but well-documented connection between tending plants and reduced stress. Gardening gives you something to care for, a reason to step outside or away from a screen, and a very tangible reward at the end. For families with children, a kitchen garden is also one of the most effective ways to encourage healthy eating habits.
For Indian households specifically, growing staples such as coriander, mint, green chillies, garlic, and turmeric at home eliminates the frustration of buying large bunches when only a sprig or two is needed. You cut exactly what the recipe requires, and the plant grows back.
What Vegetables Can I Grow at Home in India?
The honest answer is: far more than most people expect. The following categories represent the best starting points, grouped by how they are used in an Indian kitchen.
Root Vegetables and Pantry Staples
- Tomatoes (grow in pots, containers, or grow bags)
- Potatoes (excellent in deep containers or sacks)
- Chillies and capsicum (prolific on a sunny balcony)
- Radish (ready in as little as three to four weeks)
Aromatic Herbs
- Mint (grows vigorously; keep in its own pot to control spreading)
- Coriander (grows fast; sow a fresh batch every three weeks for continuous harvest)
- Rosemary (a perennial that thrives in dry, sunny conditions)
- Oregano (low-maintenance; ready within six weeks from seed)
- Basil (prefers warmth; ideal for summer growing)
- Fenugreek, or methi (one of the easiest leafy greens to grow in India)
Medicinal Rhizomes and Bulbs
- Turmeric (grows in deep pots; harvested after eight to ten months)
- Garlic (plant individual cloves; low-maintenance and compact)
- Ginger (a tropical plant that thrives in Indian conditions)
Seasonal Vegetables
- Spinach and leafy greens (ideal in cooler months)
- Okra, or bhindi (loves heat; grows quickly in summer)
- Beans and peas (easy climbers; great for balcony trellises)
- Bottle gourd and bitter gourd (need space but reward generously)
Pro tip: If you are completely new to home growing, start with just three plants: coriander, mint and cherry tomatoes. These three are fast-growing, visually rewarding, and used in almost every Indian recipe. Once you are confident, expand the garden one plant at a time.
Step 1: Choose Your Space: Balcony, Terrace, or Garden
Before anything else, the single most important question when growing vegetables at home is where the sun falls in your space.
The most important factor in any home vegetable garden is not the size of the space; it is the amount of direct sunlight available. Most vegetables and herbs require at least four to six hours of direct sunlight per day. Without this, plants become leggy, produce poorly, and are far more susceptible to pests and disease.
Sunlight check. Before buying a single pot, spend one day observing your space. Note when the sun first hits the area and when it moves away. A south-facing or west-facing balcony or terrace in India will almost always meet the four- to six-hour minimum.
Best Vegetables for a Small Balcony (Under 50 Square Feet)
Compact spaces are not a limitation; they require smarter choices. The following grow well in pots and containers, even on the smallest Indian balcony:
- Coriander, mint, basil and fenugreek (any medium pot, 15–20 cm deep)
- Cherry tomatoes (a deep pot of at least 30 cm)
- Green chillies (a medium pot; very productive in small spaces)
- Garlic (a standard pot; plant five to six cloves per container)
- Ginger and turmeric (a wide, shallow tray at least 25 cm deep)
- Radish and spring onions (any container at least 20 cm deep)
Best Vegetables for a Terrace Garden
A terrace gives you the room to think bigger. You can use grow bags, raised beds, or clusters of large pots. Terraces in India also tend to get excellent sunlight throughout the year.
- Tomatoes (standard or indeterminate varieties in 12–15 litre pots)
- Potatoes (30–40 litre sacks or deep containers)
- Okra and beans (large pots; okra grows quickly in summer heat)
- Rosemary and oregano (terracotta pots; they like good drainage)
- Ginger, turmeric and garlic (wide grow bags; excellent for rhizomes)
- Spinach and leafy greens (shallow trays; perfect for dense planting)
Growing on a Windowsill or Indoors
Windowsill growing is best reserved for herbs that do not need deep roots, such as coriander, mint, basil, and spring onions. A window that faces south or south-west in the northern hemisphere (or north or north-west in India’s lower latitudes) will give the best results. If natural light is limited, a basic grow light placed 15–20 cm above the plants for 12–14 hours a day makes a meaningful difference.
Step 2: The Right Soil Mix for Pots and Containers
This is the single area where most beginners go wrong. Garden soil dug directly from the ground is too heavy for pots. It compacts quickly, drains poorly, and suffocates roots. For container growing, you need a mix that is light, well-draining, and nutrient-rich.
For most vegetables and herbs, we use a simple three-part mix: 1 part garden soil + 1 part coco peat + 1 part vermicompost. Cocopeat improves drainage and aeration. Vermicompost provides slow-release nutrients. This combination works well for tomatoes, herbs, potatoes, and all the rhizomes covered in this guide.
Soil Mix Adjustments by Plant Type
| Plant Type | Recommended Mix | Key Tip |
| Herbs (mint, coriander, basil) | 1 part soil + 1 part cocopeat + 1 part compost | Ensure drainage holes are clear; herbs hate waterlogged roots |
| Tomatoes and chillies | 1 part soil + 1 part cocopeat + 1 part compost + handful of neem cake | Feed with liquid fertiliser every two weeks once flowering begins |
| Potatoes | 1 part soil + 1 part cocopeat + 1 part compost + sand for drainage | Bury seed potato 10–15 cm deep; mound soil as the plant grows |
| Turmeric, ginger, garlic | 1 part soil + 1 part cocopeat + 1 part compost | Keep soil consistently moist but never waterlogged |
| Rosemary and oregano | 1 part soil + 2 parts cocopeat + 1 part coarse sand | These prefer slightly drier, well-aerated soil; water sparingly |
Avoid using soil from under trees, near construction sites, or from pots that have recently hosted a diseased plant. If buying a commercial potting mix, choose one labelled specifically for vegetables, and mix in a generous handful of vermicompost per pot.
Step 3: Choosing Pots, Containers and Grow Bags
The container you choose affects drainage, root temperature, watering frequency, and, ultimately, your plant’s yield. Here is a practical guide to the most common options available in India:
| Container Type | Best For | Minimum Size | Notes |
| Terracotta pot | Herbs, chillies, garlic | 15–20 cm diameter | Breathable; dries out faster; ideal for rosemary and oregano |
| Plastic pot | Tomatoes, coriander, mint | 25–30 cm diameter | Retains moisture longer; affordable and widely available |
| Grow bag (fabric) | Tomatoes, potatoes, chillies | 15–40 litres | Excellent aeration; air-prunes roots for healthier growth |
| Recycled container | Herbs, radish, spring onions | Any, min. 15 cm deep | Tin cans, old buckets, and crates all work; add drainage holes |
| Raised bed/tray | Leafy greens, turmeric, ginger | 20–25 cm deep | Great for terrace growing; efficient use of horizontal space |
One rule that always applies: Every container must have drainage holes. Standing water at the bottom of a pot is the leading cause of root rot in home gardens. If your pot does not drain freely, add a layer of coarse gravel or broken terracotta at the base before filling with soil.
Step 4: How to Plant Seeds, Transplants and Kitchen Scraps
There are three ways to start a home vegetable garden, and each has its own advantages. Many Indian households already have everything they need in their kitchen to get started today.
Starting from Seeds
Seeds are the most economical option and offer the widest variety. Sow seeds at the depth specified on the packet, typically one to two centimetres deep, in moist soil. Cover lightly, water gently, and keep the pot in a warm spot until germination occurs, usually within five to fourteen days, depending on the plant.
Using Transplants or Seedlings
Buying seedlings from a nursery is the fastest route to a productive garden. Transplants are already past the delicate germination stage, so you see results sooner. When transplanting, handle the roots gently, water well immediately after planting, and keep the plant out of harsh afternoon sun for the first two to three days while it settles.
Growing from Kitchen Scraps
This is one of our favourite approaches, and it costs almost nothing. Several common kitchen ingredients can be planted directly to grow new plants:
- Garlic: Plant individual cloves, flat end down, about three to four centimetres deep. New shoots appear within a week.
- Ginger: A fresh rhizome from the market with visible growth nodes can be planted in moist soil. Cover with two to three centimetres of mix.
- Turmeric: Plant a fresh rhizome with at least one bud in the same way as ginger. Ensure the soil stays consistently moist.
- Potatoes: Cut a potato into sections, each with at least one ‘eye’. Leave cut sections to dry overnight before planting.
- Spring onions: Place the rooted white base of a store-bought spring onion in a glass of water. Once roots develop, transfer to the soil.
A note on patience: Kitchen scraps take slightly longer to establish than nursery seedlings, but once they do, they are robust and well-adapted to your environment. Give them two to three weeks before expecting visible growth above the soil.
The Indian Climate Planting Calendar (2026 Edition)
Because the Indian climate varies drastically by region, we’ve categorised planting schedules into three core cycles:
- The Monsoon Surge (June–Sept): Focus on gourds and leafy greens.
- The Winter Bounty (Oct–Feb): Ideal for cruciferous vegetables and tubers.
- The Summer Survival (March–May): Heat-tolerant herbs and deep-root ginger.
Step 5: Root Vegetables and Pantry Staples: Potatoes and Tomatoes
Potatoes and tomatoes are two of the most rewarding vegetables to grow at home, and both are well-suited to container gardening. Whether you have a small balcony or a large terrace, either plant can produce a meaningful harvest with the right setup.
How to Grow Potatoes at Home?
Potatoes need depth more than width. A 30- to 40-litre grow bag, or any deep container at least 40 cm tall, is ideal. Plant seed potatoes or cut potato pieces with visible eyes about 10 to 15 cm below the surface. As the plant grows, continue mounding soil or compost around the base to encourage more tuber formation. Potatoes are typically ready to harvest 10 to 12 weeks after planting, once the leaves begin to yellow and die back.
How to Grow Tomatoes at Home?
Tomatoes are one of the most versatile crops for a home garden. Cherry tomato varieties are especially well-suited to balconies and containers; they are compact, prolific, and ripen quickly. Plant tomato seedlings deep, burying the stem up to its first set of leaves, which encourages a stronger root system. Tomatoes are heavy feeders, so liquid fertiliser every two weeks once flowering begins will make a significant difference to your yield.
Step 6: The Aromatic Herb Garden: Mint, Coriander, Rosemary and Oregano
Growing herbs at home is one of the most immediately practical things you can do as a home cook. Fresh coriander and mint are used in Indian cooking almost daily, and the cost of buying small bunches repeatedly adds up quickly. A single pot of each will serve most households year-round.
How to Grow Mint at Home?
Mint is vigorous and spreads readily via underground runners. Always grow it in its own dedicated pot rather than alongside other plants. Keep the soil moist and harvest by snipping stems just above a leaf node; the plant will branch out and become fuller with each cut. Mint tolerates partial shade, making it one of the best choices for balconies with limited direct sun.
How to Grow Coriander at Home?
Coriander is a cool-season herb that tends to bolt, or go to seed, quickly in heat. To maintain a continuous supply, sow a small batch of fresh seeds every two to three weeks rather than relying on a single large planting. Soak seeds overnight before sowing to improve germination rates. Harvest by cutting the outer stems first, leaving the central growth to continue.
How to Grow Rosemary at Home?
Rosemary is a Mediterranean herb that thrives in conditions similar to those in many parts of India; it loves heat, tolerates drought, and dislikes overwatering. Grow it in a well-draining terracotta pot, water only when the top two centimetres of soil are dry, and place it in the sunniest spot available. A well-established rosemary plant can last for several years with minimal care.
How to Grow Oregano at Home?
Oregano follows the same principles as rosemary: full sun, well-draining soil, and restrained watering. It is one of the fastest herbs from seed to harvest, often ready to cut within five to six weeks of sowing. Harvest regularly, as cutting encourages bushier growth and prevents the plant from becoming woody. Oregano can also be dried easily by hanging bunches in a warm, ventilated space.
Step 7: Medicinal Rhizomes and Bulbs: Turmeric, Garlic and Ginger
Turmeric, garlic and ginger are the foundation of Indian cooking and have been valued for their medicinal properties for thousands of years. They are also surprisingly easy to grow at home, and doing so gives you access to fresh, organic rhizomes and bulbs at a fraction of the market price.
How to Grow Turmeric at Home?
Turmeric is a long-season crop that takes eight to ten months from planting to harvest, but it requires very little attention in between. Plant fresh rhizomes with at least one visible bud in a wide, deep container. Keep the soil consistently moist and place the pot in a warm, partially shaded spot; turmeric does not like intense afternoon sun. You will know it is ready to harvest when the leaves turn yellow and begin to die back.
How to Grow Garlic at Home?
Garlic is one of the simplest bulbs to grow at home and requires very little space. Separate a bulb into individual cloves and plant each one, flat end down, about three to four centimetres below the soil surface. Space cloves six to eight centimetres apart. Garlic takes approximately four to six months to reach full maturity; harvest when the lower leaves begin to brown, and the green tops start to fall over.
How to Grow Ginger at Home?
Ginger thrives in warm, humid conditions, which makes it an ideal plant for most of India. Choose a fresh, plump rhizome from a market or grocery store; look for one with multiple visible growth buds. Plant it just below the soil surface in a wide, shallow container, and water regularly to keep the soil evenly moist. Young ginger shoots appear within two to three weeks. The plant is ready to harvest after eight to ten months, though you can harvest small pieces earlier for fresh use.
Indian Seasonal Planting Calendar: What to Grow and When
One of the most common questions from people growing their own vegetables at home is when to plant which vegetable. The answer depends on your region, but the table below gives a reliable starting point for most Indian climates.
| Months (India) | Best Vegetables | Best Herbs |
| March to June | Tomatoes, okra (bhindi), chillies, bottle gourd, bitter gourd, cucumber | Tulsi, basil, lemongrass; start ginger rhizomes |
| July to September | Spinach, beans, radish, capsicum, leafy greens, cluster beans (guar) | Mint, coriander, and curry leaf all thrive in monsoon humidity |
| October to February | Potatoes, garlic, turmeric (plant in spring, harvest in winter), carrots, cauliflower, peas, broccoli | Mint, coriander, rosemary, oregano, fenugreek (methi) |
| All seasons | Tomatoes (warm climates or indoors), chillies, spinach, spring onions | Tulsi, mint, lemongrass; most herbs with frost protection |
How to Water Your Home Vegetable Garden (Without Overwatering)
Overwatering is the single most common mistake in home gardening, and it is far more damaging to plants than underwatering. The roots of most vegetable plants need both moisture and oxygen; permanently waterlogged soil denies them the latter and leads to root rot.
The one-inch rule. Before watering, push your finger one inch (approximately two to three centimetres) into the soil. If it feels moist, do not water. If it feels dry, water thoroughly until water runs out of the pot. This single habit will prevent the majority of overwatering problems.
Watering Frequency by Plant Type
- Tomatoes and chillies: Water when the top two centimetres of soil are dry, typically every one to two days in summer.
- Herbs (coriander, mint, basil): Keep soil consistently moist but not waterlogged. In hot weather, this may mean daily watering.
- Rosemary and oregano: Water only when the top three to four centimetres of soil are fully dry. These herbs are drought-tolerant.
- Ginger, turmeric and potatoes: Maintain consistent moisture throughout the growing season, but reduce watering significantly as harvest approaches.
- Garlic: Water moderately; garlic tolerates dry spells but benefits from consistent moisture during bulb formation.
Balcony and container pots in Indian summers can dry out rapidly, particularly terracotta pots in direct sun. Check soil moisture daily during April, May and June. Grouping pots also helps retain moisture, as the plants create a small, humid microclimate around them.
Natural Pest Control: Neem Oil, Companion Planting and Home Remedies
Every home garden encounters pests at some point. The good news is that most common pest problems in an urban Indian garden can be managed effectively with organic remedies, many of which use ingredients already in your kitchen.
Neem Oil Spray (The All-Purpose Solution)
Neem oil, derived from the seeds of the neem tree, is one of the most effective and safe organic pesticides available. It works against aphids, whiteflies, spider mites, mealybugs, and a wide range of fungal diseases.
To make a basic neem oil spray:
- Mix five millilitres of cold-pressed neem oil with one litre of warm water.
- Add two to three drops of dish soap to help the oil emulsify.
- Shake well and spray on all leaf surfaces, including the undersides, where pests typically hide.
- Apply in the early morning or evening, never in direct midday sun.
- Repeat once a week as a preventive measure, or every three days if pests are already present.
Garlic Spray (For Aphids and Fungal Issues)
Crush four to five garlic cloves and steep in one litre of water overnight. Strain and spray directly onto affected plants. The strong sulphur compounds in garlic deter aphids and many soft-bodied insects and have a mild antifungal effect.
Companion Planting
Certain plants protect their neighbours naturally. Planting basil alongside tomatoes helps deter aphids and whiteflies. Marigolds planted at the edges of a vegetable garden repel nematodes and many common pest insects. Mint, when planted near brassicas and beans, confuses pests with its strong scent.
Baking Soda Spray (For Powdery Mildew)
Mix one teaspoon of baking soda with one litre of water and a few drops of dish soap. Spray on leaves showing signs of powdery mildew, a white dusty coating common on cucurbits and some herbs. This raises the leaf’s surface pH, making it inhospitable to fungal spores.
Prevention is far easier than a cure. Most pest problems in a home garden begin with overcrowded or stressed plants. Ensure adequate spacing between pots, remove dead or yellowing leaves promptly, and maintain good air circulation around your plants. A fortnightly neem oil spray as a preventive measure is far less work than managing a full pest infestation.
Your Personalised 2026 Planting Calendar
Since you are operating in Maharashtra, you are in a Tropical/Subtropical transition zone. The Southwest Monsoon and the distinct dry heat of the Vidarbha region heavily influence your planting cycles.
1. The Monsoon Surge (June – September)
- What to plant: Chillies, Brinjal (Eggplant), Okra (Bhindi), and various Gourds (Bitter gourd, Bottle gourd).
- Key Task: Ensure your containers have “High-Drainage” holes. 2026 weather patterns suggest heavier-than-usual rainfall; use a potting mix with 30% perlite or coarse sand to prevent root rot.
2. The Winter Bounty (October – February)
- What to plant: This is your “Golden Window.” Focus on Tomatoes, Leafy Greens (Palak, Methi), Carrots, Radishes, and cruciferous veggies like Cauliflower.
- Key Task: This is the best time for Medicinal Roots. Plant your Garlic cloves and Ginger rhizomes now; they love the cooler soil temperatures for initial root establishment.
3. The Summer Survival (March – May)
- What to plant: Amaranth (Chaulai), Mint, Malabar Spinach, and Cluster Beans (Gawar).
- Key Task: Use Mulching. Cover the top layer of your soil with dried leaves or straw to keep the roots cool, as temperatures in Maharashtra can spike significantly during these months.
Pro Tip: If you are in coastal areas like Mumbai/Konkan, watch for powdery mildew during the humid monsoon. If you are in drier regions like Nashik or Nagpur, increase your watering frequency by 20% during the dry heat of April.
Output: Expect your first harvest of leafy greens in 25–30 days, while medicinal roots like Ginger will require 8–10 months of patience.
Why Are My Plants Dying? Troubleshooting 7 Common Problems
If something is going wrong in your home garden, the cause almost always falls into one of the following categories. Identifying the problem early makes it much easier to fix.
1. Why Are My Tomato Leaves Turning Yellow?
Yellow leaves on tomatoes are most commonly a sign of overwatering, nitrogen deficiency, or insufficient sunlight. Check the soil: if it is consistently wet, reduce watering frequency and ensure the pot has adequate drainage. If the soil drains well and the yellowing is on the lower, older leaves only, it is likely a natural process as the plant directs energy to fruiting. A feed of balanced liquid fertiliser often resolves early nitrogen deficiency.
2. Why Is My Coriander Bolting So Quickly?
Bolting, when a plant rushes to flower and set seed rather than producing leaves, is coriander’s most common challenge. It is triggered by heat and long daylight hours. To slow bolting, keep coriander in a spot with afternoon shade, sow seeds in batches every two to three weeks, and always use whole seeds rather than split ones. In hot Indian summers, coriander grows best as a morning-sun-only plant.
3. Why Are My Plant Roots Rotting?
Root rot is almost always caused by overwatering in combination with poor drainage. If you suspect root rot, remove the plant from its pot, trim away any black or mushy roots with clean scissors, and repot in a fresh, well-draining mix. Allow the soil to dry out more between waterings going forward. Treating with a diluted solution of copper fungicide or a neem-based solution can help prevent the spread of fungal infection.
4. Why Are My Mint Leaves Turning Brown?
Brown or crispy leaf edges on mint usually indicate underwatering or excessive direct sun. Mint prefers consistently moist soil and does well in partial shade. Water more frequently and move the pot to a spot with morning sun only. If the browning is on lower leaves and the plant otherwise looks healthy, it may simply be old growth; trim it back, and the plant will regenerate.
5. Why Are My Chilli Plants Not Producing Fruit?
Chilli plants need a combination of adequate sunlight, consistent watering, and good pollination to set fruit. In a balcony garden without wind or insects to assist pollination, gently shake the flowering stems by hand every few days, or use a soft paintbrush to transfer pollen between flowers. Ensure the plant is receiving at least five to six hours of direct sunlight and is being fed with a potassium-rich fertiliser once flowering begins.
6. Why Are My Garlic Bulbs So Small at Harvest?
Small garlic bulbs are usually the result of planting in shallow soil, harvesting too early, or insufficient nutrients during bulb formation. Garlic needs at least 15 cm of soil depth to develop properly. Ensure you are not harvesting until at least half of the green leaves have browned and fallen over. A feed of balanced compost mid-season also helps bulb development.
7. Why Is My Ginger Not Sprouting?
Ginger rhizomes can take two to four weeks to show above-soil growth, so patience is the first answer. If there is still no sign of growth after a month, the most likely causes are rhizomes that are too old or desiccated, soil that is too cold, or overwatering before the rhizome has established roots. Use fresh, plump rhizomes with visible buds, keep the pot in a warm spot above 20°C, and water sparingly until the first shoots appear.
Can I Grow Vegetables from Kitchen Scraps?
Yes, and it is one of the most satisfying ways to start a home garden. Growing from kitchen scraps produces free plants, reduces food waste, and produces results quickly. Here is a quick reference for the most practical options:
| Kitchen Scrap | How to Start | Time to First Harvest |
| Garlic clove | Plant point side up, 3–4 cm deep in the soil | 4–6 months for full bulb; garlic greens in 2–3 weeks |
| Ginger rhizome | Plant bud-side up, 2–3 cm below the soil surface | 8–10 months; small pieces usable from 4–5 months |
| Turmeric rhizome | Plant bud-side up, 2–3 cm deep; keep warm and moist | 8–10 months |
| Potato eye | Cut the potato into 1–2 eyes; dry overnight; plant 10 cm deep | 10–12 weeks |
| Spring onion base | Place the rooted base in water; transfer to soil once roots develop | 2–3 weeks |
| Coriander seeds | Soak overnight; sow 1 cm deep in moist soil | 3–4 weeks to first harvest |
Frequently Asked Questions About Growing Vegetables at Home
What is the easiest vegetable to grow at home for beginners?
Coriander, mint, spring onions, and radish are the four easiest plants for a home garden. All four grow quickly, require minimal space, tolerate some neglect, and produce harvests within three to four weeks of planting. Cherry tomatoes are a close runner-up and offer the satisfaction of a larger, more visible harvest.
How much sunlight do vegetables need to grow at home?
Most vegetables require at least four to six hours of direct sunlight per day. Leafy greens and herbs such as mint and coriander can be stored for as little as three to four hours. Fruiting plants such as tomatoes, chillies, and okra need the full six hours, ideally more. If your space does not meet this threshold, focus on leafy greens and shade-tolerant herbs rather than fruiting vegetables.
Can I grow vegetables on my apartment balcony?
Yes. A balcony that receives at least four hours of direct sunlight each day is sufficient for a productive herb and vegetable garden. Start with pots of coriander, mint, chillies, and cherry tomatoes. Use lightweight fabric grow bags to keep the weight manageable, and group pots together to help retain moisture. Even a very small balcony can produce enough herbs and salad greens to reduce your weekly shopping bill meaningfully.
Do I need to fertilise my home vegetable garden?
If you start with a good soil mix that includes compost or vermicompost, you will not need to add fertiliser immediately. Most plants benefit from a liquid feed every two weeks when actively growing or flowering. For organic home gardeners, compost tea, banana peel liquid fertiliser, and diluted seaweed extract are effective and inexpensive options. Avoid over-fertilising, particularly with nitrogen-heavy feeds, as this encourages leaf growth at the expense of fruit and root development.
What is the best container size for growing tomatoes at home?
For standard tomato varieties, use a container with a minimum volume of 12 to 15 litres. Cherry tomato varieties can manage in slightly smaller pots, but always do better with more root space. Deeper is generally better than wider, as tomatoes develop an extensive root system. Fabric grow bags of 15 to 20 litres are an excellent choice for growing on balconies and terraces.
How do I know when my vegetables are ready to harvest?
The best indicators of harvest readiness vary by plant. Tomatoes should be fully coloured, slightly soft to the touch, and come away from the vine with a gentle twist. Coriander and mint leaves can be harvested once the plants have three to four healthy stems. Potatoes are ready when the leaves yellow and die back. Garlic is ready when approximately half the green leaves have turned brown. For ginger and turmeric, the leaves dying back signal that the rhizomes have matured.
How do I keep pests away from my home garden organically?
The most effective organic pest management strategy combines prevention and treatment. Apply a diluted neem oil spray once a fortnight as a preventive measure. Ensure good air circulation between pots, remove dead leaves promptly, and avoid overwatering, as damp, stagnant conditions attract pests and fungal disease. If pests appear, treat immediately with neem oil or a garlic spray, and isolate the affected plant from others if the infestation is severe.
Can I grow vegetables indoors without a balcony?
Yes, though the options are more limited. Herbs such as coriander, mint, and spring onions grow well on a sunny windowsill. If natural light is insufficient, a basic LED grow light running for 12 to 14 hours a day will support most herbs and some leafy greens. Fruiting plants such as tomatoes and chillies are difficult to sustain long-term indoors without grow lights, but they can be started indoors and moved outside once the weather permits.
Your First Harvest: A 30-Day Quick-Start Checklist
The biggest obstacle when learning how to grow your own vegetables at home is not space, cost, or skill. It is simply beginning. The checklist below gives you a concrete starting point that can be completed in a single afternoon with minimal investment.
Week 1: Set Up
- Choose your sunniest spot and observe it for at least half a day to determine the number of sunlight hours.
- Source three to four pots or grow bags of appropriate depth (a mix of sizes is ideal).
- Prepare your soil mix: equal parts garden soil, cocopeat and vermicompost.
- Plant one pot of coriander from seed, one pot of mint (from a cutting or nursery plant), and one cherry tomato seedling from a nursery.
- If you have kitchen garlic, plant three to four cloves in a small pot.
Week 2: Establish
- Water daily in the morning; use the one-inch finger test before each watering.
- Observe for signs of germination in your coriander pot (this may take five to ten days).
- Ensure your tomato seedling is staked if it is growing tall.
- Check under leaves for pests; apply a diluted neem oil spray as a preventive measure.
Week 3: Grow
- Your coriander should now be producing harvestable leaves. Harvest outer stems first.
- Mint should be growing vigorously; pinch out the growing tips to encourage bushiness.
- Sow a second batch of coriander seeds for a continuous supply.
- Add a second pot: consider chillies, spring onions, or spinach, based on the season.
Week 4: Harvest and Expand
- By the end of week four, you should have your first fresh harvests of coriander and mint.
- Assess what is working and what needs adjustment: sunlight, watering, or pot size.
- Plan your next addition: potatoes or tomatoes for a larger harvest, or ginger for the long term.
- Share what you have grown; nothing motivates a new gardener quite like feeding someone from their own harvest.
The most important thing we can tell you is to start small, observe, and build on what works. A single well-grown pot of coriander is worth far more than ten poorly grown pots.
Every gardener, no matter how experienced, loses plants from time to time. The difference between those who give up and those who build thriving kitchen gardens is simply that the latter keep planting.